


Table of contents
Hi there everyone,
Hope coding is going awesome. In this blog, I am discussing how to run Mistral in your local Windows system.
Before that let's understand - What is Mistral ? Why Mistral ? Different versions of models released by Mistral AI?
Mistral (Mistral 7B) and Mixtral 8X7B are open source LLM models released by Mistral AI. Mistral 7B beats Llama 2 13B models on all benchmarks. MIXTRAL 8X7B, a heavier model, matches or outperforms Llama 2 70B, as well as GPT3.5, on most benchmarks. Now why that matters ? Since they are open source and provide two endpoints - Embeddings, and text generation, they are very useful for business as they provide facility to train large models with multiple GPU’s and nodes, incorporating new pre-training datasets, dataset preprocessing, monitoring and logging of model training, performing evaluation and measuring bias (moreinfo_) .
Let's get started with using it. We will discuss both ways i.e. via code and via an application, to generate text based on the input provided by the user.
The No-code way
You can play around with Mistral in LM Studio or GPT4all. These are the software that run the model for you, even without internet.
You can install them here - LMStudio , GPT4all.
Now after installing, let see step by step, how to load Mistral and start using it in each of these.
A. LMStudio
Step 1 - Download LMStudio and run it. You will encounter a screen like this-

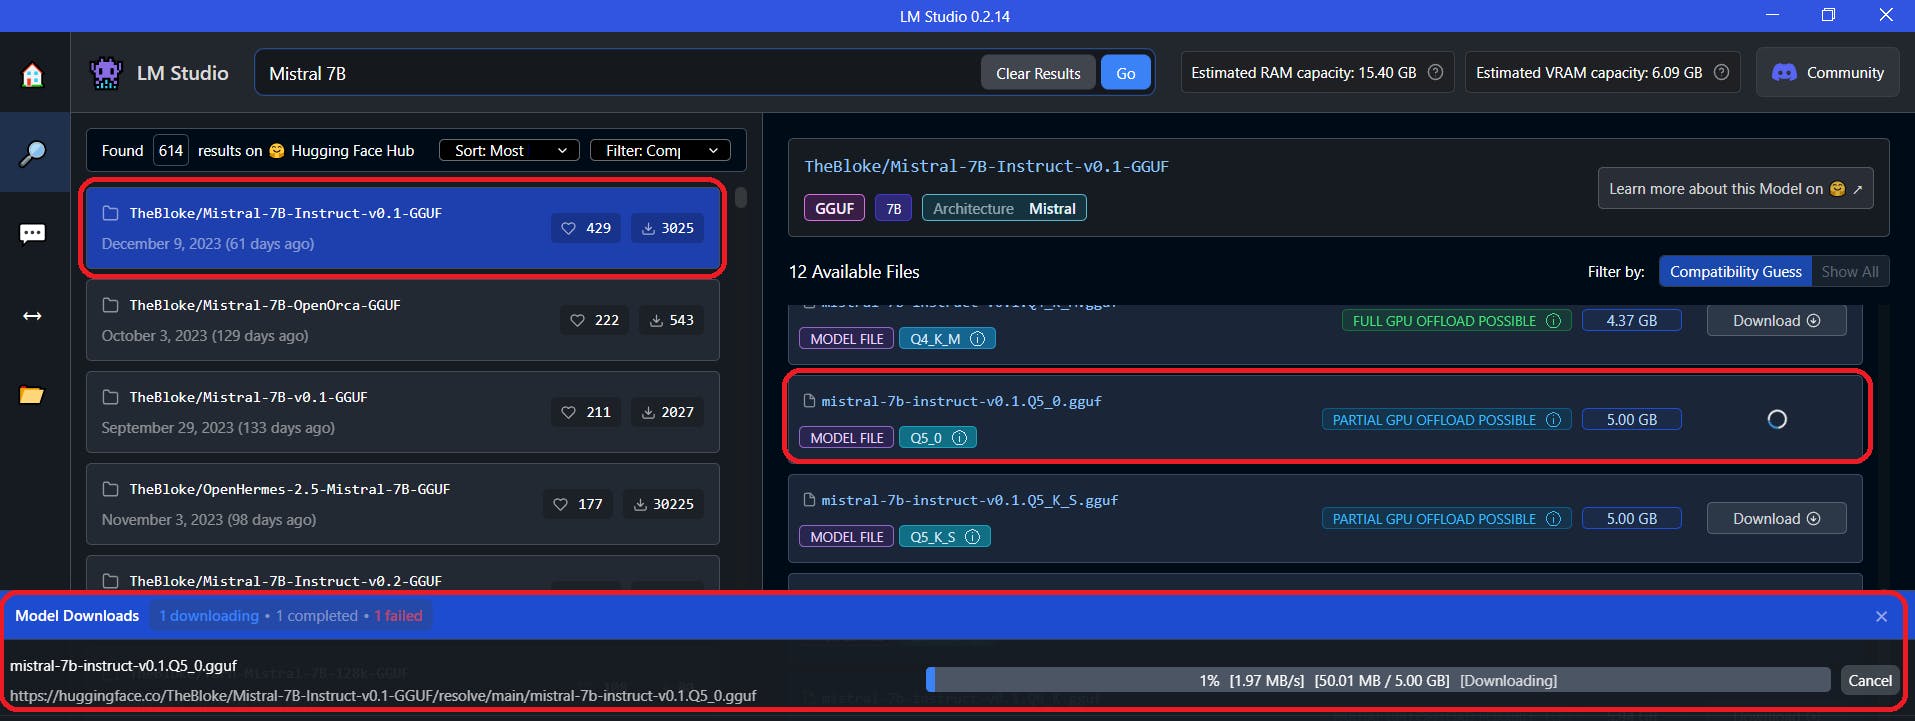
Now you can look out for any LLM model. In this blog we are going to run Mistral 7B, you can choose heavier version of Mistral according to your hardware specifications.
Step 2 - You can see many variants of Mistral 7B. You can read more about these variants here. These variants usually occur when model is trained on different datasets.
Step 3 - After download is complete, you can access the model in 'AI Chat' in the left navigation.
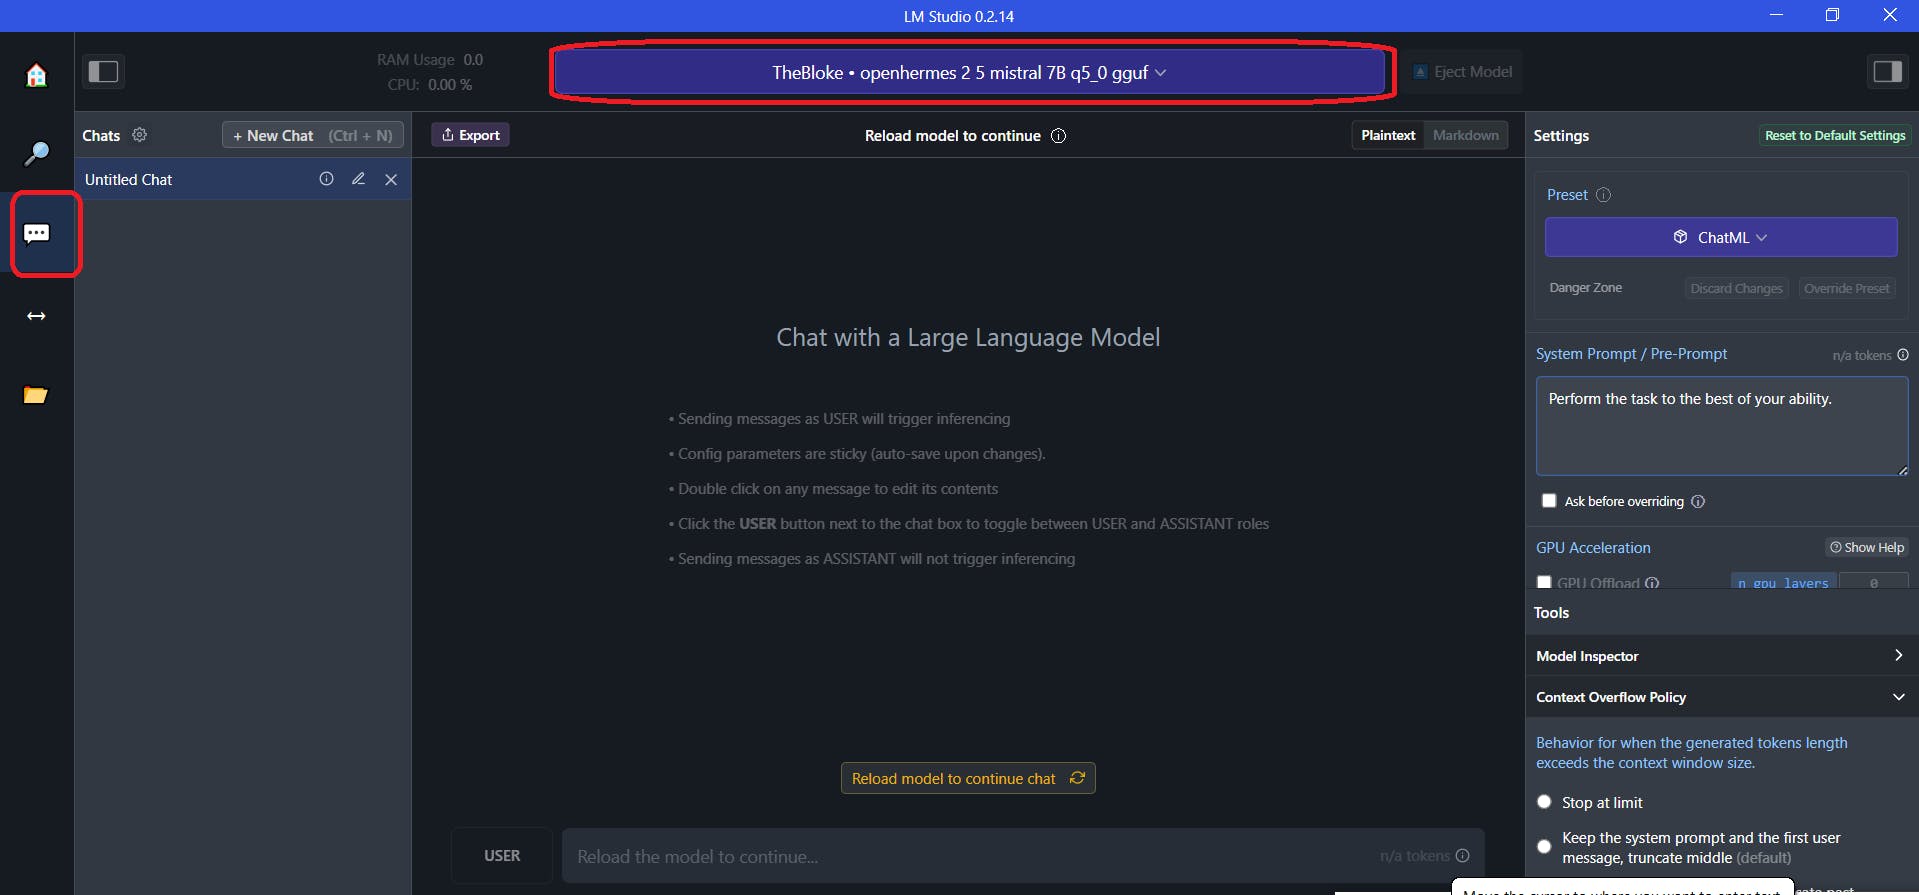
Now you can play around with Mistral in LMStudio.
B. GPT4all
Let's see how you can do the same thing in GPT4all, just in case LMStudio isn't something you want. GPT4all doesn't require GPU support and hence can be useful.
Step 1 - After downloading GPT4all, you can see a screen like this -
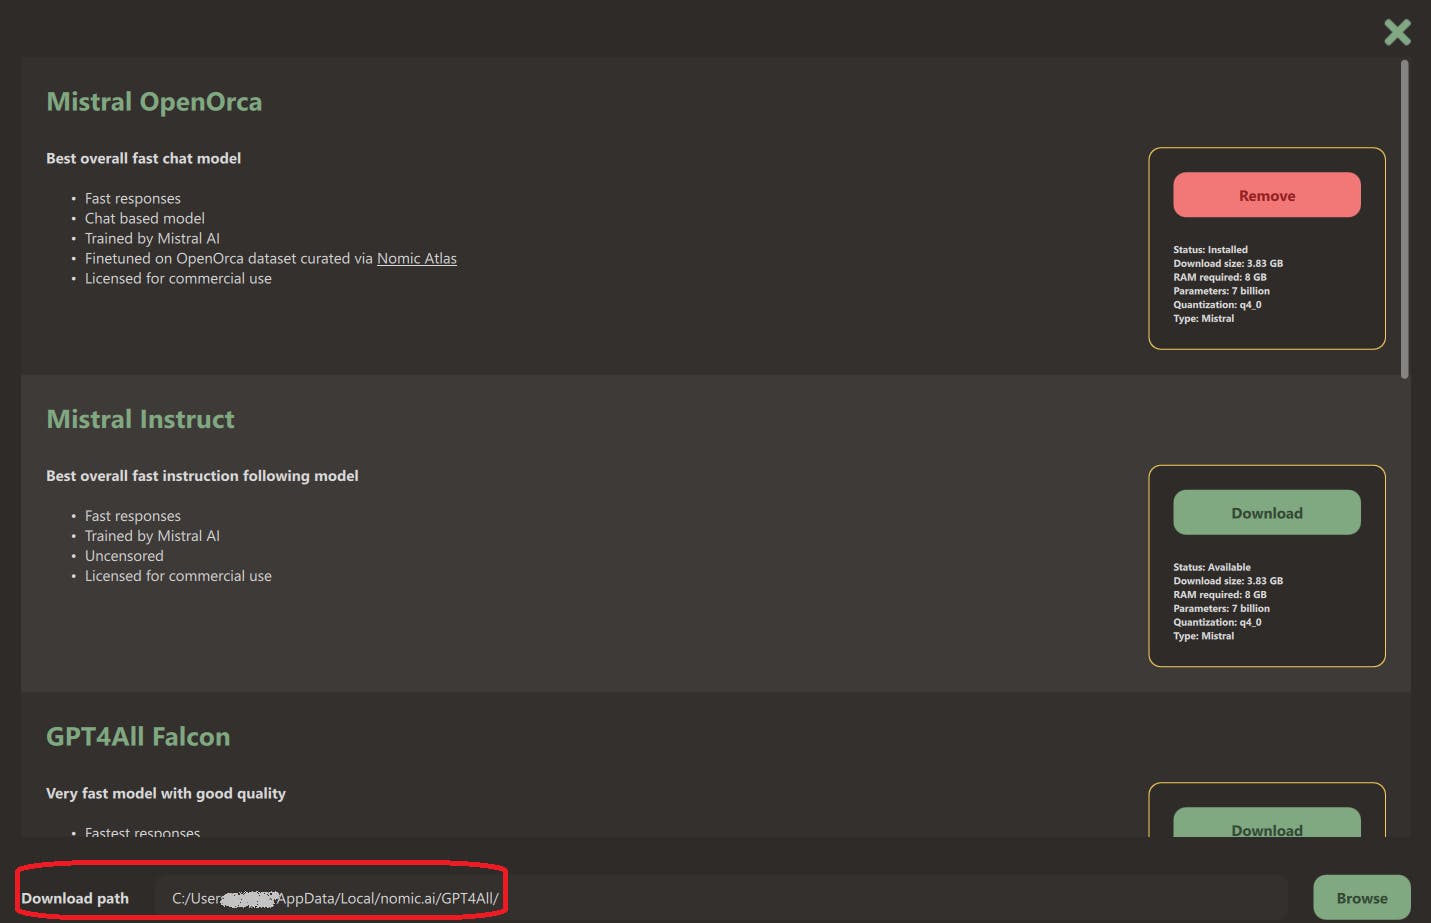
You can set the download path and download the Mistral model. After downloading it, you can close it and access the model like this -

Now you can play around with Mistral in GPT4all.
The Code way
For using Mistral in python code, we are going to use the Hugging Face Transformers library to generate text using Mistral, a pretrained language model. Here's a breakdown of what each part of the code does:
Install necessary packages: transformers and torch if they are not already installed.
Import required modules:
A. torch: PyTorch, a deep learning framework.
B. AutoModelForCausalLM and AutoTokenizer: These are used for automatic loading of the appropriate model and tokenizer based on the provided model name.
!pip install transformers torch
import torch
from transformers import AutoModelForCausalLM, AutoTokenizer
Define the model and tokenizer:
A. model_name is set to "mistralai/Mistral-7B-v0.1".
B. AutoTokenizer.from_pretrained loads the appropriate tokenizer based on the provided model name.
C. AutoModelForCausalLM.from_pretrained loads the Mistral model.
model_name = "mistralai/Mistral-7B-v0.1"
tokenizer = AutoTokenizer.from_pretrained(model_name)
model = AutoModelForCausalLM.from_pretrained(model_name)
Prepare input text:
A. input_text is the example text that serves as the starting point for text generation.
B. tokenizer.encode converts the input text into token IDs using the loaded tokenizer.
input_text = "Write a funny story about a dog and a cat"
input_ids = tokenizer.encode(input_text, return_tensors="pt")
Generate text:
A. model.eval() sets the model to evaluation mode, which disables dropout regularization and other effects during inference.
B.torch.no_grad() ensures that gradients are not calculated during inference, which reduces memory consumption and speeds up computation.
C. model.generate generates text based on the provided input token IDs. In this case, it generates text with a maximum length of 512 tokens.
model.eval()
with torch.no_grad():
    output = model.generate(input_ids, max_length=512)
Decode and print the output:
tokenizer.decode converts the generated token IDs back into text, skipping any special tokens that may have been added during generation.
The decoded text is then printed to the console.
output_text = tokenizer.decode(output[0], skip_special_tokens=True)
print(output_text)
That's it. That is how you can play around with Mistral using python code.